

|
|
|
The following example shows how to extract student names and contact details from the Synergetic database directly using Microsoft Query.
Also, see:
To create a new query using Microsoft Query directly:
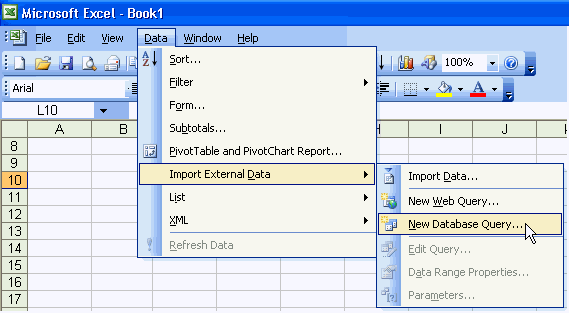
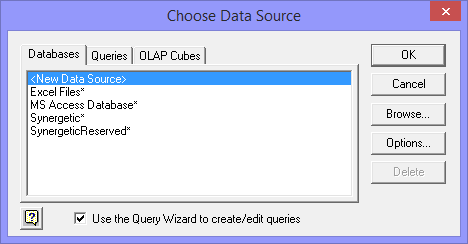
The Choose Data Source window is displayed.
![]()
The SQL Server Login window is displayed.

Note: This is your usual Synergetic username and password.
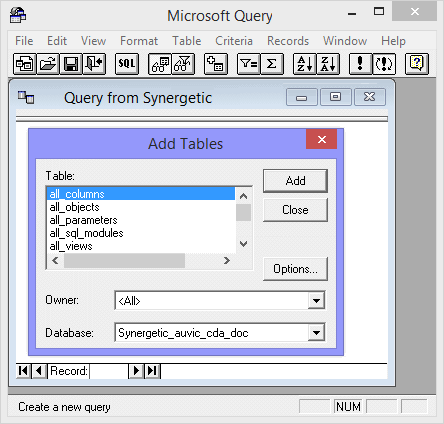
The Add Tables window is displayed.
.gif)
Tip: Press v on the keyboard to position at the first view.
Note: If you only need the views to be displayed, click ![]() and clear all but the Views field. Also, if you are using SQL 2005 you can limit the number of entries displayed by selecting dbo from the Owner drop-down list.
and clear all but the Views field. Also, if you are using SQL 2005 you can limit the number of entries displayed by selecting dbo from the Owner drop-down list.
.gif)
The table is added to the Microsoft Query window.
.gif)
Tip: To add another table later, select Table > Add Tables.
Note: In this example, we are only using views that have already been created by Synergetic Management Systems. If you are using multiple tables then joins need to be made between them. Contact Synergetic Management Systems for more information.
If you want to remove a table, click on it then press Delete on your keyboard.
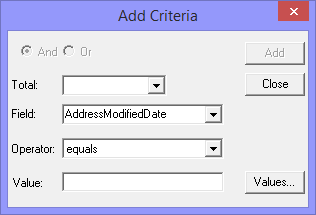
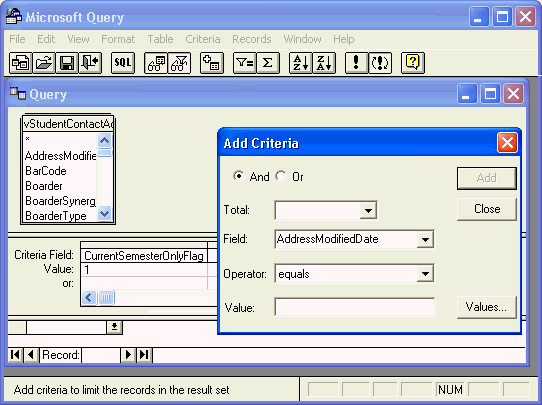
The Add Criteria window is displayed.
.gif)
Note: We recommend using CurrentSemesterOnlyFlag = 1 rather than FileYear and FileSemester selections.
Note: If you select a value from the Field drop-down list, you can choose from any field in the table you have added. In the wizard you can only choose from the fields that you add from the table.
Tip: Click ![]() to display all values available for this field.
to display all values available for this field.
The criteria is added to the query window.
.gif)

.gif)
The field (column) is added to your data set.
.gif)
Note: To remove a field, select the column heading as shown in the example above then press the Delete key on your keyboard.
The Sort window is displayed.
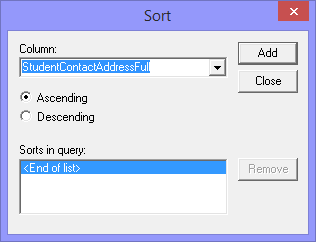
The sort criteria is added to the Sort window.
.gif)
Note: The sort selections must already have been added to your query already.
.gif)
Note: You can adjust the height of the rows and the width of the columns so that you can view the information more fully. This is done in the same manner as in Microsoft Excel by dragging the column and row dividers ![]() .
.
.gif)
The Import Data window is displayed.
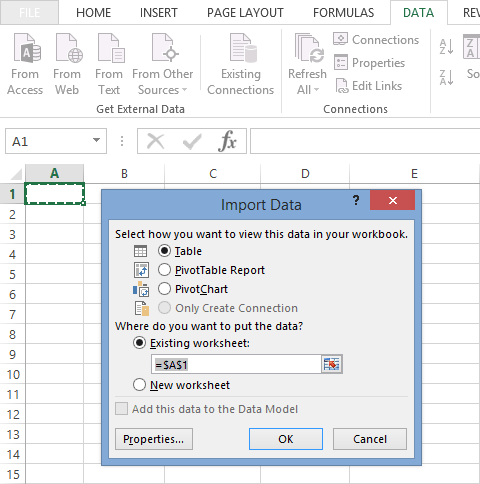
The data is retrieved and placed in the spreadsheet.
.gif)
Tip: Select Data > Import External Data > Data Range (Microsoft Excel 2003) to edit additional query settings.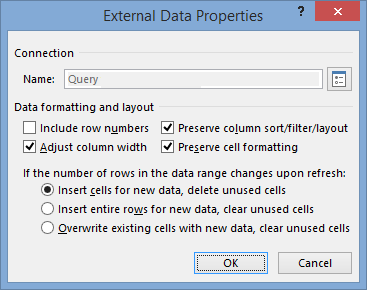
Last modified: 20/07/2017 2:24:26 PM
|
See Also |
© 2017 Synergetic Management Systems. Published 20 July 2017.
